|
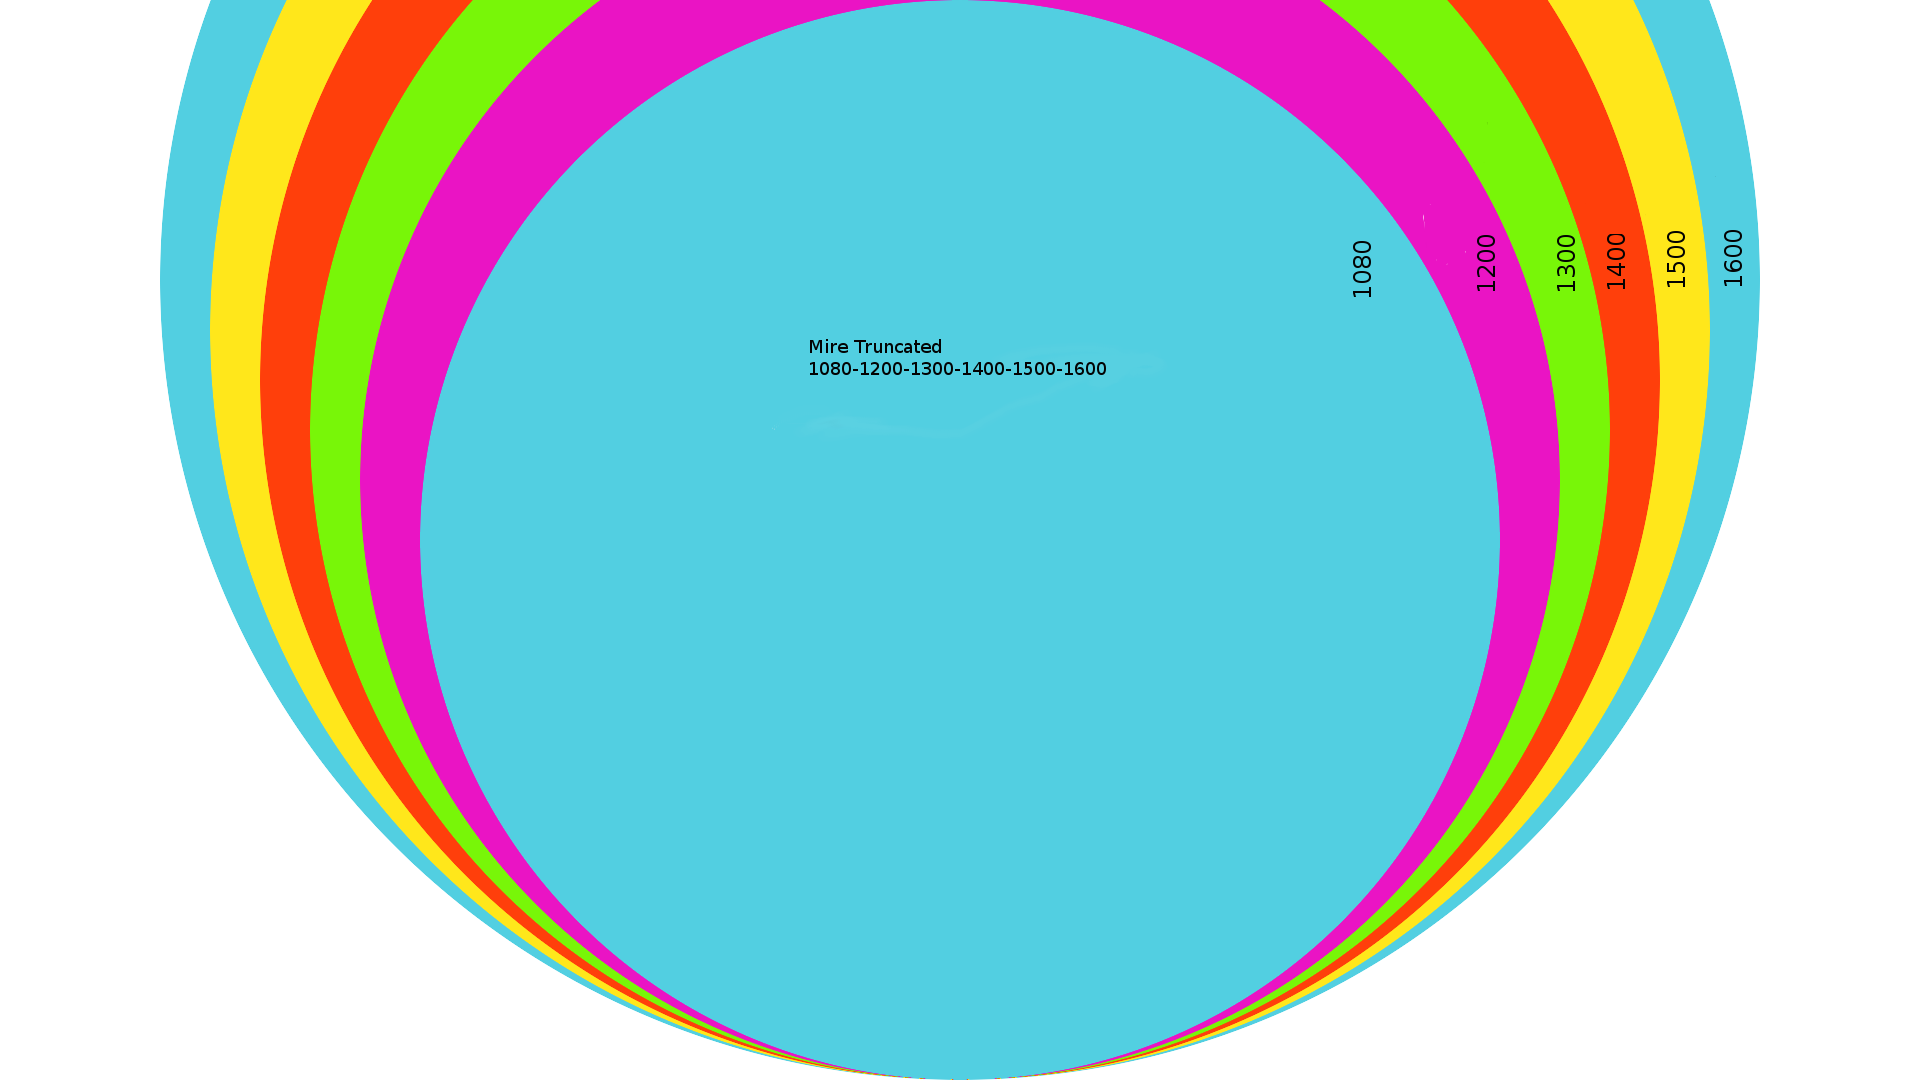
THE "TRUNCATED" MODE
Introduction
With
a FullHD videoprojector (1920x1080) and a LSS bloc, it's possible to increase
the picture resolution in an efficient manner.
| Advantage |
Drawbacks |
| Resolution (1400 to
1600 frame) |
Loss the northern horizon |
| sligntly brighter picture |
oriented projection |
Part
of the lost picture is proportional to the gain in resolution, since according
to the north-south meridian, the number of pixels will always be limited
to 1080. Then, we get situations similar to those obtained with a spherical
mirror system (P.Bourke process), but with a quality of projection and
resolution constant from center to edges.
Lost
Horizon
So, the
size of lost picture on the northern horizon will be
Hlost
= 180 *[ 1 – (1080/resolution)]
| Resolution East / West |
North horizon lost |
| 1200 |
18° |
| 1400 |
41° |
| 1600 |
58,5° |
Testing
and using...
For the
first measure, we can use a pattern (click on picture to download).
To increase
the field of pixels, reduce the zoom. In the installation of Yves Lhoumeau,
the circle 1080p is obtained at maximum zoom position.
To adjust
the picture in Truncated mode:
Reduce
the zoom (to the minimum)
Change
the inclination of the beamer (rear pads)
Refocusing...
The field
in truncated mode depends of the optical combination (type of Bloc / type
of beamer). Depending on the combining, the limit will be 1200p or 1600p
Stellarium360
adaptation for truncated mode
It can
easily be configurated with the software.
First,
you have to edit the distortion.dat file located here:
/usr/local/share/stellarium360/data/distortion.dat
It contains
as follows:
# This
file contains fisheye distortion correction parameters
# and
truncated mode configuration for Stellarium360.
#
# On
the DESKTOP build, lens 1 is always used.
#
# Each
distortion definition begins with a lens, height, pconfig line where:
#
lens = lens number
#
height = window height in pixels, or 0 to match any height
#
pconfig = projection configuration:
#
0 = truncated (or default configuration when truncation isn't an option)
#
1 = lens at dome center
#
2 = lens below dome center (such as for projection angles much under 180
degrees)
#
# Following
this is an optional viewport line, of the form:
#
viewport CENTER_X CENTER_Y RADIUS
# If
these are between 0 and 1, they are interpreted as fractions of the screen
width,
# otherwise
as pixel values. CENTER_Y is measured up from the bottom of the screen.
#
# Following
this are distortion correction lines of two types:
#
L = lens distortion
#
G = geometry (projector placement) distortion
#
# Each
type has two subtypes (as separate lines)
#
P = project function parameters
#
U = unproject function parameters
#
# parameters
are:
#
a, b, c, limit, fudge_factor
#
# where
for projection (unit circle):
#
if (f < limit ) {
#
f = a*f + b*f*f + c*f*f*f;
# }
else {
#
f = f + fudge_factor;
# }
#
# (see
src/fisheye_projector.cpp for implementation details)
#
### Default
lens, any resolution, no distortion, allows truncated mode
lens
1 height 0 pconfig 0
viewport
960 800 800
LP
1.0 0.0 0.0 1.0 0.0
LU
1.0 0.0 0.0 1.0 0.0
lens
1 height 0 pconfig 1
LP
1.0 0.0 0.0 1.0 0.0
LU
1.0 0.0 0.0 1.0 0.0
lens
1 height 0 pconfig 2
LP
1.0 0.0 0.0 1.0 0.0
LU
1.0 0.0 0.0 1.0 0.0
### END
OF FILE ###
The line
"viewport 960 800 800" means that the resolution is 1920 and the center
is located at X=960 (=1920/2) and Y=280 (=1080-800 in FullHD 1080p). The
radius here is R=800.
To activate
the truncated mode, you'll have to go to the Configuration Menu (M = Spanner)
and go to the sub-menu 8.8 Projection configuration and select "Truncated
projection" with the "Return" and "arrows" keys.
Adapting
movies for truncated mode
If you
are working with domemasters directly, I suggest to use XnView that permits
to modify your images one by one in a batch mode to resize and crop to
the desired values.
With
videos directly, I suggest using VirtualDub. More limited but very powerful
if you master how works the "filters" section of the software.
Yves LHOUMEAU &
Lionel RUIZ
|